The subject of this blog is taking Windows XP virtual. The idea is to stop using Windows XP, for reasons that I explained in my "XP is an Orphan - What Next" post. However, some of us can't just stop using Windows XP. The system has been out there for 12+ years, and there's good software made for it that, because the publishers went out of business or were bought up, just isn't going to get upgraded to work with Windows 7. There's lots of software that small businesses use that would cost the proverbial arm-and-a-leg to replace in Windows 7, and there's also lots of hardware that isn't getting driver software written for it for new operating systems. Now I'll not say that any system is perfect in this regard - Linux in particular has problems with Canon gear, as Canon have historically been reluctant to offer Linux drivers. There are ways around this, but they're geeky and complicated.
So one more possible drawback to moving to any new operating system is that you lose the use of some vital parts of your hardware, and that it'll then cost you a fortune to upgrade that too! Therefore, if you need use of some specific piece of hardware, ensure first that the new operating system - be it Linux, Windows, or Apple - can happily talk to your hardware.
Theory
What this means is to use a program that runs on your operating system of choice and which pretends to be the hardware of a computer!

Looking at the diagram above, the main box is what your current operating system sees as its "world". The green bit is the free space it has to put programs in - there's one in there already, called "Program" (sorry! - imagination is running short today!) and, within this Host OS, there are some extra bits, called "Driver Software".
There's one bit for your monitor, one for your printer, one for your wi-fi, and even some for things like keyboards, mice, and hard drives. Some come in the BIOS, so you can start your machine, and some are added later when you buy new things, like printers, scanners, and wi-fi.
So you can see that the operating system that all your programs talk to in order to get to do things like print, or show things on the screen, or accept keystrokes from the keyboard doesn't really talk directly to these pieces of hardware either! It talks to very specialised little bits of software that, in turn, talk to the hardware.
Because of this, one can write a program that pretends to be a computer, and load it up with an operating system (called the Guest OS). So long as the program can accept instructions to do things with all the hardware that an operating system expects to talk to and give back the right answers then the operating system won't know any better!
Practice
There are two parts to the practice - one is to get your Guest System and the other is to get it to run inside your Virtual Machine program that you run on your Host system.
Getting your VM
You can use the VirtualMachine program to create a Virtual Disc for you (essentially just a large file), or you can get a pre-built one.
If you build your own (a matter of a few mouse-clicks actually - nothing difficult!) then you'll need to bring your own operating system (Windows, MacOS, or Linux) to run in it, as all you'll have is what you get when you buy a ne hard drive and pop it into your PC - a PC that's willing to boot but doesn't have anything to boot from!
Alternatively you can go pre-built. You can download pre-built discs from a variety of sites, including here and also at Oracle's Developer Network site. If you're coming from a Windows environment you can download a Microsoft program called disk2vhd, available free from several places, including Microsoft! You can use this program to create a copy of your Windows system disk (or any other disk, for that matter) that can be booted from by your Virtual Machine.
Installing your VM
This is a pretty easy task - you just have to attach the disk image and go!
I'm going to show you here using Oracle's Virtual Box running on Linux. Virtual Box works pretty much the same on all three major platforms, so using it means that you have minimal trouble if you move from Linux to, say, Apple as your Host system.
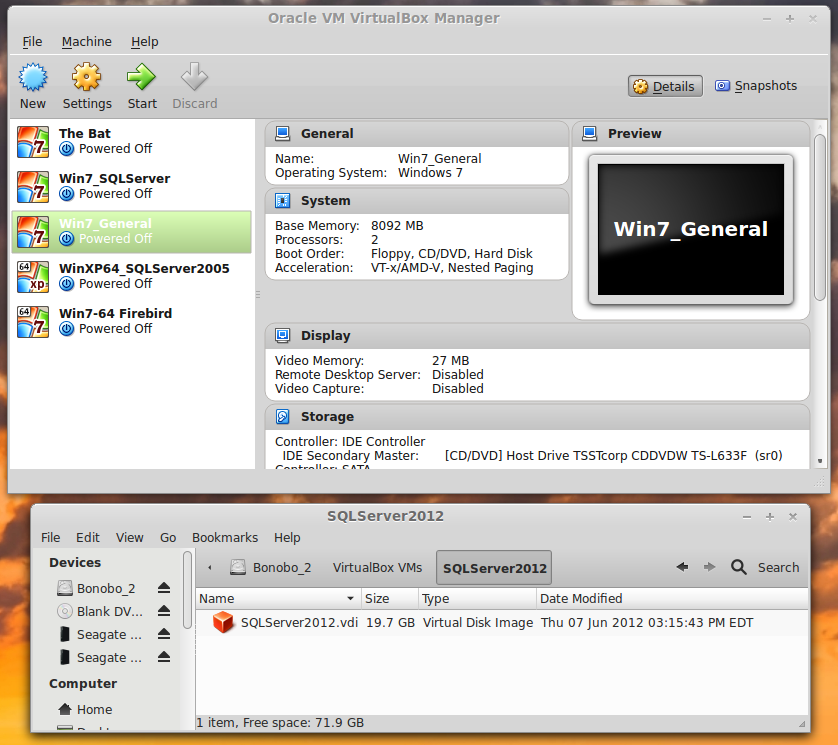 Here's what I have to start with (right) - you'll see at the bottom a Nautilus (a File Manager) window open on the folder holding the disk image I want to mount as my C: drive in my new Virtual Machine (VM for short). It's called SQLServer 2012.vdi, as it's hosting a copy of SQL Server 2012!
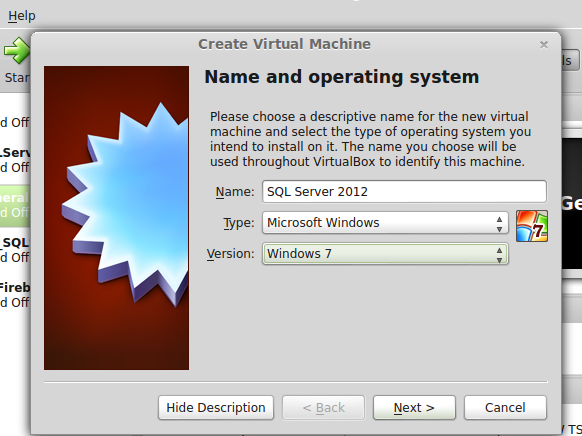 First, I have to create a new machine (Machine | New from the menu) - see left - and then walk through the chain of prompting dialogs, answering a series of simple questions.
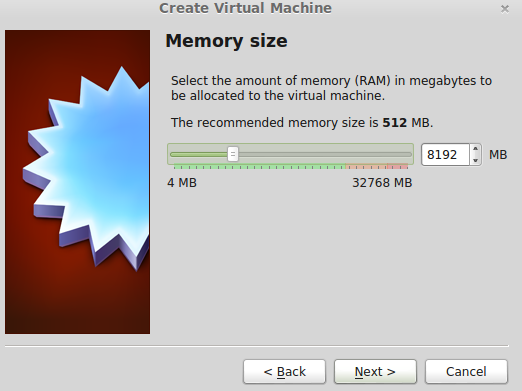 This one asks me for a name for the machine and the operating system I'm going to run inside it.
Next I have to tell VirtualBox how much RAM I'm going to give the VM for its RAM. To do this I can type in the amount (being a geek I know all the appropriate powers of two, but if you don't then just slide the bar slider. You can't go too far - see the brown area at the right to show where my physical memory tops out! I'm giving this machine 8 GB of RAM to play in.
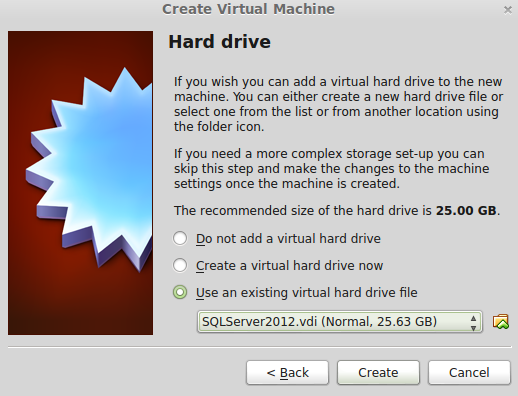
Step three is to add your hard drive. In my case I already have one made, so I selected the third option and found my file. If you don't already have a disk file ready to go you can select the second option and create one, here-and-now.
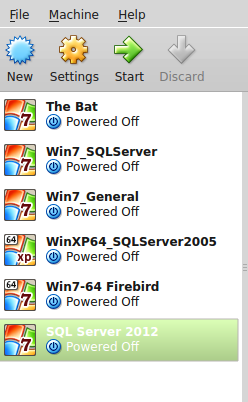 On the left you can see the list of machines that I can launch after I added my new SQL Server 2012 machine, which has an entry at the bottom, highlit in green.
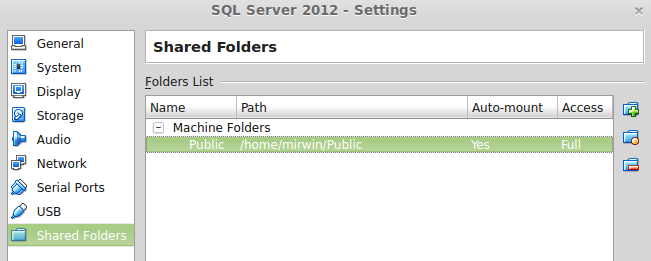 Before I start I need to make one major addition - connect the Operating System inside the VM to the Host machine. I can do this by sharing a piece of my Host's hard drive, in this case a folder called Public. It will appear inside a Windows machine as a mapped drive.
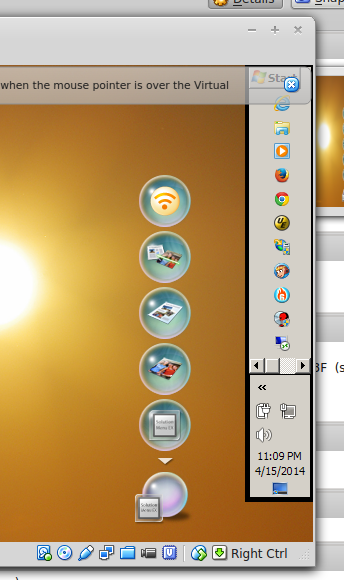
Fairly soon you'll be able to log in to Windows. As you can see on the right the Windows running inside the VM looks totally normal (yes, I keep my task bar up the right-hand side of the screen!).
If you look closely at the bottom-right of the screen-shot to the right you'll see some icons on the status bar. Here they are, enlarged (below).

These tell you what's going on in your machine - the fourth along, for example shows network activity (i.e. internet traffic). The legend "Right Ctrl" indicates that your Guest and Host machines are sharing the mouse: if it gets caught by the Guest machine then the right control key will release it back to the Host machine
to be extended very soon!
No comments:
Post a Comment